Why empowering nurses makes all the difference
Wound experts Sarah Sage and Professor Michelle Barakat-Johnson discuss the critical role nurses play in the prevention and evidence-based management of pressure injuries, and offer their top tips for early detection.
Pressure injuries are one of the most persistent and costly challenges in healthcare, but those best placed to prevent them are often the people closest to the patient: nurses.
Empowering nurses to act quickly
Nurses’ proximity to patients gives them unparalleled insight into subtle changes that could signal early skin breakdown. They notice when a patient’s skin integrity is changing - yet organisational barriers can sometimes delay timely intervention.
“Empowering the people at the bedside to make changes as quickly as possible is key,” says Sarah Sage, Clinical Nurse Consultant in Wound Management at the Royal Melbourne Hospital.
“In large hospitals, there are so many variations of beds, mattresses and cushions that it can be difficult for staff to know if they’re using the optimal combination. We need to make sure the nurses have both the permission and the resources to make those adjustments right there at the bedside, without waiting for multiple approvals.”
Michelle Barakat-Johnson, Professor of Wound Care and Skin Integrity at the University of Sydney and Sydney Local Health District, agrees: “Nurses are the first line of defence. They perform daily skin assessments, anticipate risks and advocate for the right equipment and care plans. Their role in early identification and ongoing management is absolutely crucial.”
Identifying pressure injuries
Pressure injuries are classified from Stage 1 to 41,2, then Suspected Deep Tissue Injury and Unstageable:
- Stage 1: Non-blanchable erythema of intact skin - an early warning sign.
- Stage 2: Partial-thickness loss of dermis, presenting as an abrasion or blister.
- Stage 3: Full-thickness skin loss with subcutaneous fat visible.
- Stage 4: Full-thickness skin and tissue loss with exposed bone, tendon, or muscle.
- Unstageable: Full-thickness tissue loss with the base obscured by slough or eschar.
- Suspected Deep-Tissue Injury: Purple or maroon intact skin or blood filled blister.

Download a copy of the Quick Guide to Pressure Injury Management by the Pressure Injury Treatment Advisory Group (PITA).
In Australia, Stage 2 pressure injuries account for most treatment and hospital length of stay costs, so stopping the progression of Stage 1 pressure injuries could result in big cost-savings for the healthcare system3.
Use this step-by-step guide to conduct a blanch test on Stage 1 pressure injuries and help prevent them from progressing.
- Ensure good lighting, wash your hands and wear gloves if required.
- Identify skin that is reddened, discoloured or, in darkly pigmented skin, has localised warmth, oedema, or changes in tissue consistency such as bogginess or firmness.
- Use your index finger to gently press on the reddened or area of concern and observe the response.
- Blanchable erythema: The area turns white under pressure and returns to red within a few seconds after releasing.
- Indicates good blood flow and no tissue damage.
- Non-blanchable erythema: The area remains red and does not turn white under pressure.
- Suggests damage to the microcirculation and may indicate a Stage 1 pressure injury.
- Blanchable erythema: The area turns white under pressure and returns to red within a few seconds after releasing.
- Pay particular attention to tissue over bony prominences and areas in contact with medical devices.
Early detection: use all the senses
Both experts stress that early detection of pressure injuries requires more than just a visual scan – it’s about using touch, communication and clinical reasoning. “Early identification involves both visual and tactile assessments,” says Professor Barakat-Johnson. “Nurses should look and feel for signs such as boggy or firm areas over bony prominences, and talk to patients about any pain or discomfort they notice.”
For Ms Sage, combining validated tools with clinical intuition is key. “We use a validated risk assessment tool like the Braden Scale,” she explains. “But we add extra questions. For example, have they had a pressure injury before? Do they have a deformity or poorly controlled pain? Do they have a medical device? Even if the overall score isn’t high, we encourage nurses to look at sub-scores and say, ‘Clinically, I think they’re at high risk,’ and act accordingly.”
Take a comprehensive approach
Pressure injury prevention involves4:
- nutrition assessment
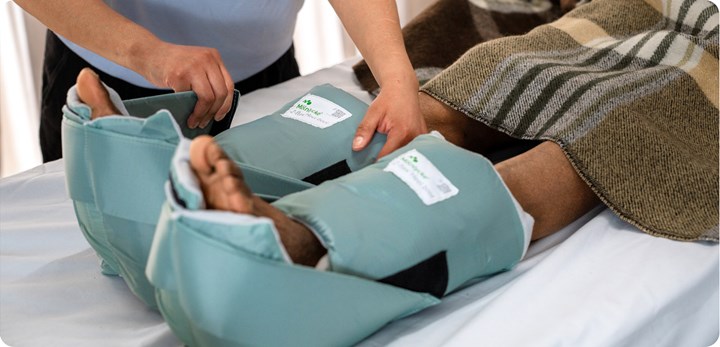
- repositioning and offloading, using devices such as heel boots
- skin hygiene
- incontinence management
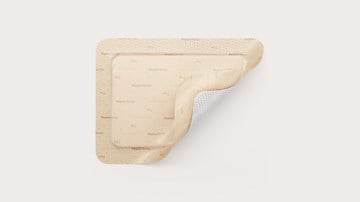
- prophylactic dressings to reduce pressure and shear
- correctly fitting medical devices
- monitoring
- education and support for the patient
Practical tips from the experts
Ms Sage’s top tips
- Look and touch regularly. Observe the skin in good light and use your hands — feel for changes in temperature or moisture.
- Escalate any changes immediately. Early intervention can stop an injury from progressing.
- Address individual risk factors. If a patient is incontinent, focus on skincare and toileting. If mobility is limited, use hoists or adjust bed mechanics to improve repositioning.
- Empower clinical judgment. Trust your instincts when something looks or feels off.
- Act early and often. Prevention is a dynamic process – review and respond continually, adjusting the type of wound dressing to suit the stage of the injury.
Professor Barakat-Johnson’s top tips
- Quick risk screening. Combine skin checks with a review of comorbidities that have an impact on the pressure injury risk.
- Use multi-component prevention strategies. Combine repositioning, support surfaces and prophylactic dressings based on individual needs.
- Apply clinical judgment. Don’t rely solely on scores – interpret what’s happening in front of you.
- Share what works. Knowledge sharing among teams improves confidence and care quality.
- Document thoroughly. Record that the intervention was performed and who did it, when, what was done and the patient’s response. Good documentation reinforces best practice and supports continuity of care.
Top takeaways
- Trust your clinical judgment – you’re the first to see changes.
- Risk screening is not about a score, it’s about understanding the factors that place the patient at risk .
- Act quickly, document thoroughly and escalate concerns early.
- Stay up to date with evidence-based guidelines.
- Remember: prevention starts with you.
Join us for a special Worldwide Stop Pressure Injury webinar presentation by Sarah Sage on Tuesday 18 November from 2–3 pm AEST.
Sarah will explain the hierarchy of clinical evidence and discuss the importance of real-world evidence and guidelines for clinical decision-making.
References:
- National Pressure Injury Advisory Panel, European Pressure Ulcer Advisory Panel and Pan Pacific Pressure Injury Alliance. Prevention and Treatment of Pressure Ulcers/Injuries. The International Guideline: Fourth Edition. Emily Haesler (Ed.). 2025. Available from: https://internationalguideline.com.
- European Pressure Ulcer Advisory Panel, National Pressure Injury Advisory Panel and Pan Pacific Pressure Injury Alliance. Prevention and Treatment of Pressure Ulcers/Injuries: Clinical Practice Guideline. The International Guideline. Emily Haesler (Ed.). EPUAP/NPIAP/PPPIA: 2019.
- Nghiem S, Campbell J, Walker RM, Byrnes J, Chaboyer W. Pressure injuries in Australian public hospitals: A cost of illness study. Int J Nurs Stud 2022;130:104191.
- Australian Commission on Safety and Quality in Health Care (ACSQHC). Pressure Injury Prevention and Management: Clinical Care Standard. Sydney: ACSQHC; 2020.


